
Order the wrong size of ceiling trap door and nothing else about the project goes smoothly. The ceiling contractor has already set out the subframe, the board is ready to go on, and the panel that arrives is either too big for the opening or leaves a gap the flange cannot hide. It goes back, the ceiling stays open, and a small ordering detail becomes a site delay.
Most of those failures are not manufacturing defects. They come from two avoidable decisions: ordering a default size instead of the size the job actually needs, and ordering by the wrong dimension. This guide fixes both. It explains the A-size versus B-size rule in plain language, shows the arithmetic with worked examples, and gives you a way to choose between a standard Planea panel and a custom Zenith+ assembly before you place the order.
The direct answer
Order by A-size, the visible opening dimension — edge to edge, what you will actually see in the finished ceiling. Then size that opening by the largest thing that must pass through it, not by the size of the grille, the valve, or the panel your last project used. If the largest item cannot come out through the opening, the opening is too small, however standard it looks on paper.
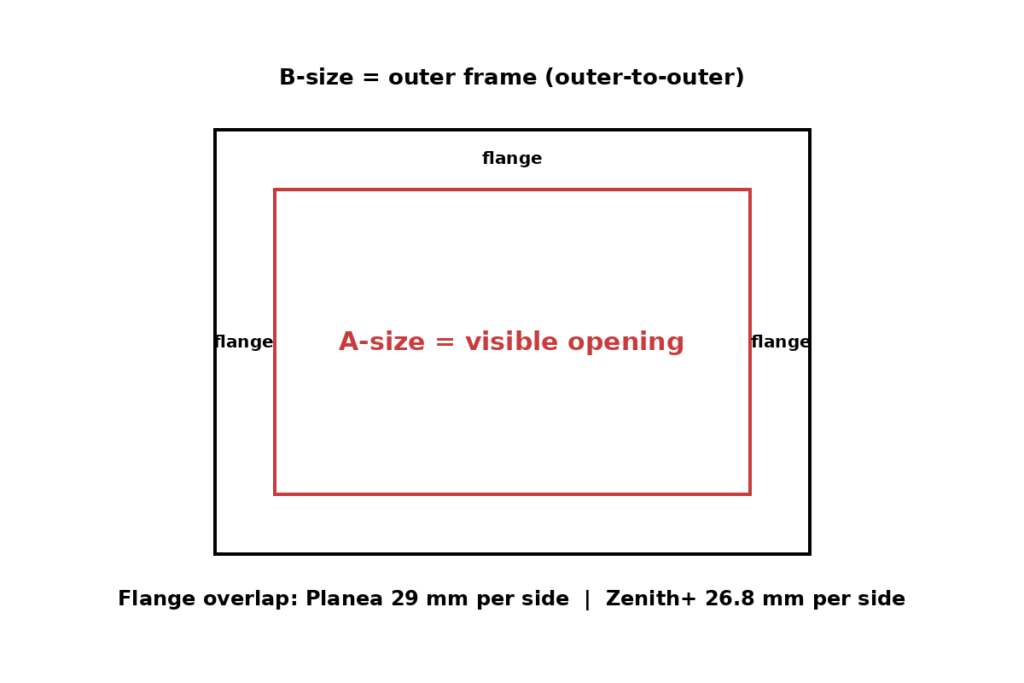
B-size is the outer frame size. It is larger than A-size because the outer frame flange overlaps the ceiling board edge on all four sides and hides the cut. The flange is 29 mm per side for Planea and 26.8 mm per side for Zenith+, according to the manufacturer’s technical FAQ and the Skyhatch specification table. So B equals A plus twice the flange figure. If you give a supplier the B-size when they asked for A-size, or the other way round, the panel will not fit the set-out — even though both numbers describe the same product.
For a new gypsum board ceiling, specify A-size. The board runs over the flange from B to A, and the visible opening is what matters. For a POP ceiling, or where the subframe is already tied, give B-size, because the opening left in the POP, with its wire mesh protruding into it, corresponds to B. That distinction comes from the manufacturer’s guidance, and it is worth stating on the order itself rather than leaving the supplier to guess which ceiling you have.
A-size vs B-size, explained with numbers
Picture the panel from below. The part you see in the finished ceiling is the shutter and its infill, edged by a shadow groove of only 2 to 2.5 mm. That visible rectangle is A. Around it sits the outer frame. Its flange extends beyond the visible opening on every side and disappears under the ceiling board. The outer-to-outer dimension of that whole frame is B.
The relationship is simple arithmetic, and it is worth doing on paper before ordering:
- Planea: B = A + 29 mm + 29 mm (29 mm flange on each side)
- Zenith+: B = A + 26.8 mm + 26.8 mm (26.8 mm flange on each side)
Here are worked examples, calculated from those figures and nothing else:
| Series | A-size ordered (visible opening) | B-size (outer frame) |
|---|---|---|
| Planea | 600 × 600 mm | 658 × 658 mm |
| Planea | 600 × 1200 mm | 658 × 1258 mm |
| Zenith+ | 600 × 600 mm | 653.6 × 653.6 mm |
| Zenith+ | 1500 × 2400 mm | 1553.6 × 2453.6 mm |
Notice what happens with the most common mistake. A buyer measures a 600 × 600 mm opening in an existing ceiling, orders “600 × 600” without saying whether that number is A or B, and receives a Planea panel whose frame is 658 × 658 mm. If the ceiling set-out was made for a 600 mm frame, the panel cannot go in. Conversely, if the buyer measured the frame of an old panel at 658 mm and ordered that as A, the new visible opening would be far larger than intended. The numbers are not interchangeable, and the order should always carry the letter: “A-size 600 × 600” or “B-size 658 × 658”.
One caution belongs here, because it affects real orders. Skyhatch’s Planea product page currently summarises the flange as 26.8 mm for both series, while the manufacturer’s FAQ and the pillar specification table give 29 mm for Planea. This guide follows the series figures above, and you should confirm the flange figure for your series when you request a quote, until that product page is corrected. A one-line confirmation at quote stage costs nothing; a wrongly sized frame costs a return visit.
Why the 600 × 600 default causes so many problems
The 600 × 600 mm panel became the default for a understandable reason. It matches a standard ceiling grid module, it is easy to stock, and for a single small service point it is often genuinely enough. The problem starts when it is treated as the answer to every access question, regardless of what sits above the ceiling.
A fan coil unit, a ductable air-conditioning unit, a large valve bank, or an air handling unit does not care about grid modules. What matters is whether the unit itself, or its largest removable part, can pass through the opening, and whether a technician can work on it through that opening with hands and tools. A panel that is exactly the size of a grille is not the same as a panel that gives working access to the machine behind the grille. If the machine cannot come out, the ceiling will eventually be cut anyway — which defeats the purpose of installing an access panel in the first place.
The manufacturer’s advice is blunt and worth repeating: order the size the equipment needs, not the size a catalogue offers. Skyhatch panels are made to custom dimensions in exact millimetres, so there is no need to design around a standard size when the equipment demands something else. The standard sizes exist for routine access points. They are not a reason to undersize a plant-room opening.
Size by what must pass through: a decision table
Use this logic before you pick a number. It is a decision framework, not a claim that any particular machine has a particular size — always check the actual equipment with its vendor or services consultant.
| What needs access | How to size it | Likely direction |
|---|---|---|
| A single valve, detector, or small service point | Size to the service point plus working room for hands and a tool | Smallest standard Planea size, confirmed against the stock list |
| A fan coil unit or ductable AC unit | Size to the unit plus the space a technician needs to service and, if needed, remove it — not just the grille size | Standard Planea size that clears the unit, or custom if the unit exceeds the standard range |
| A large valve bank, long duct run, or multiple services in one bay | Size to the longest item and the working length, and consider whether one large opening beats several small ones | Zenith+ custom size, possibly multi-shutter |
| An air handling unit or plant-room equipment | Size to the largest item that must ever be removed through the ceiling, and plan the shutter logic around it | Zenith+ custom multi-shutter assembly, anchored to the structure |
Two questions sharpen every row of that table. First, what is the single largest thing that must pass through this opening over the life of the building, including a future replacement unit that may be slightly larger? Second, how often will it be opened, and by how many people? A panel opened twice a year for a valve check and a panel opened monthly for filter changes are different jobs, even at the same size, because frequency affects lock choice and shutter handling.
Planea: the standard-size series
Planea, the CTD26 series, is the single-shutter, standard-size range. According to the manufacturer’s FAQ, it covers 250 × 250 mm to 1200 × 600 mm, with 300 × 300, 450 × 450, 600 × 600 and 600 × 1200 mm held in stock. Custom sizes within that range are available on request. It uses a push lock as standard, with an Allen key lock as an option, carries a 10 to 12 mm infill of the ceiling material, and closes to a 2 to 2.5 mm shadow groove. Its sliding hinge means the shutter stays attached to the frame rather than having to be carried down a ladder, and minor on-site trimming is possible because the profile is not crimped.
Planea is the right answer when the opening is routine, the size falls inside the standard range, and stock availability matters. It is the wrong answer when the equipment dictates a larger opening, or when a single shutter at that size would become unworkable. At that point, making a bigger single panel is not the solution — changing the shutter logic is.
If you are ordering a standard size, still write the A-size on the order. “Planea 600 × 600” is understood in the trade as an A-size, but writing “A-size 600 × 600 mm, Planea, push lock” removes the one ambiguity that causes returns. State the infill material too, because the shutter carries 10 to 12 mm of whatever your ceiling is finished in, and that finish is what makes the closed panel disappear into the ceiling.
Zenith+: when standard sizes stop being enough
Zenith+, the CTD25 series, is the custom and large-format range. Its live product page gives the size range as any custom size from 900 × 1500 mm to 5500 × 2400 mm and beyond, with standard configurations listed as 900 × 1500, 1500 × 2400 and 2400 × 6000 mm. The largest delivered to date, for a Noida project, is 18 feet by 8 feet, or 5500 × 2400 mm. Note the orientation: reproduce the figures exactly as the product page states them for each configuration, rather than swapping length and width from memory.
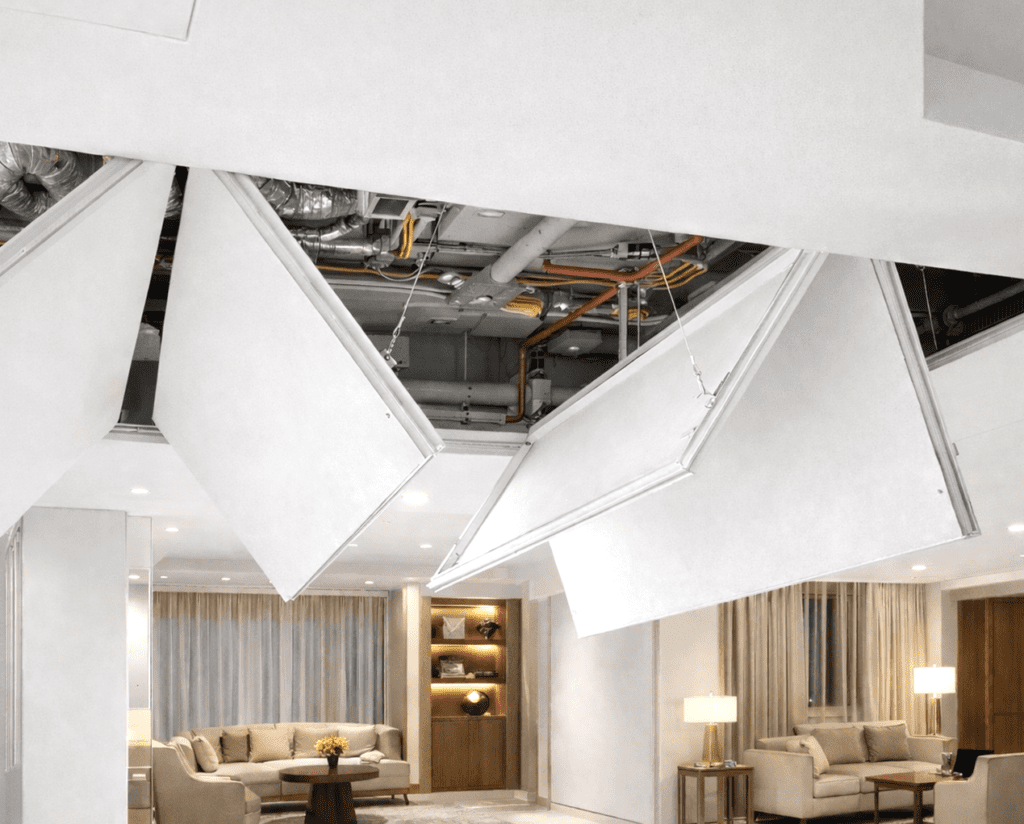
The important difference is not just size. It is shutter logic. Zenith+ is available as a single or multi-shutter assembly with two, three, four or more panels, and every shutter slides to one or both sides, leaving the whole opening clear with no crossbar across it. That is what makes a very large opening usable at all. One giant shutter at several metres wide would be heavy, awkward and unsafe to handle. Several shutters that slide aside solve the same opening without asking anyone to carry a huge panel down a ladder. The sliding-hinge blog explains that handling problem in detail; the sizing point here is that shutter count is part of the size decision, not an afterthought.
Two structural rules come with large sizes. Above 1200 mm, MS threaded rod or butterfly hanger attachment points from the building slab must be included in the drawings, so the load goes to the structure rather than the false-ceiling framing. And the shutter count should be chosen by required opening width and access frequency, following the product ordering guide. A large panel hung off ceiling framing instead of the slab is a different kind of sizing failure — the panel fits, but the ceiling carries a load it was never designed for.
Zenith+ shutters are secured with steel wire retention on each shutter and locked with an Allen key lock, which suits large, heavy shutters better than a light push lock. Both series carry GreenPro Type 1 Ecolabel certification from CII GreenPro, a third-party verified ecolabel based on a life-cycle approach, which matters on green-building projects where product documentation is part of the submission.
How to measure an opening, step by step
Measuring takes ten minutes and prevents most ordering errors. Do it in this order:
- Identify what must be serviced or removed through the opening, and get its largest dimension from the equipment vendor or services consultant. Do not guess it from the grille.
- Add working room around that dimension for hands, tools, and the angle at which the item must come out. An opening that exactly equals the item is not a working opening.
- Measure the visible opening you want, edge to edge, in millimetres. That is your A-size. Measure both dimensions, and measure twice — ceilings are rarely as square as drawings suggest.
- Decide whether you are ordering A or B. For a new gypsum ceiling, order A. For a POP ceiling or an existing framed opening, order B, and say so on the order.
- Check what is above the ceiling: clearance for the shutter to slide or open, space for hangers above 1200 mm, and whether ducts or pipes reduce the usable opening.
- Record the ceiling finish and infill thickness (10 to 12 mm), the lock type, and the number of shutters if the opening is large. Send the A-size, the ceiling type, and what must pass through it together — that one message gives the supplier everything needed to confirm the size.
For a retrofit over an existing wooden trap door, measure the existing opening and order by B, the outer frame size, because the frame must cover the existing opening. The jointed, non-crimped frame can also be resized on site to accommodate dimensional variations, which is useful when an old opening is not perfectly square — but resizing is a tolerance, not a substitute for measuring correctly in the first place.
Five mistakes that cause wrong orders
First, ordering B as if it were A, or A as if it were B. This is the mistake this whole guide exists to prevent, and it is still the most common one. Always include the letter on the order.
Second, measuring the board cutout instead of the finished visible opening. The board runs over the flange, so the cutout and the visible opening are different numbers by exactly the flange width on each side. Measure the opening you want to see, not the hole in the board.
Third, sizing to the grille or the valve instead of the machine. The visible grille is the smallest part of the job. Size to the unit behind it.
Fourth, choosing one shutter when the opening needs several. If a shutter is too large for one person to slide and secure safely, split it. Multi-shutter assemblies exist for exactly this reason, and the sliding hinge is what lets them slide aside without a crossbar blocking the opening.
Fifth, forgetting the structure above 1200 mm. A correctly sized panel on inadequately supported framing will sag, crack the surrounding board, and eventually fail. Include the hanger points in the drawings at specification stage, not as a site improvisation.
Ordering checklist: what to send with your enquiry
A complete enquiry fits in a few lines, and it removes the back-and-forth that delays most custom orders:
- A-size (visible opening) in millimetres, both dimensions, with the letter A stated
- Ceiling type: new gypsum, POP, or existing framed opening (and B-size if ordering B)
- What must pass through: the largest item, its dimensions, and how often access is needed
- Series preference, if known: Planea for standard sizes, Zenith+ for custom or large openings
- Infill material and finish, lock preference, and quantity
- Project location and whether the order is a single unit or a bulk/project quantity
For a standard Planea size, that enquiry can go to the product page and a stock order. For a custom Zenith+ size, share the same details through the Get a Quote route, because the quote depends on the exact A-size, shutter count, and support requirements. There is no minimum order quantity on the manufacturer’s side — a single unit can be ordered — but the size information still has to be exact, because custom panels are made to the dimension you give.
Frequently asked questions
What size ceiling trap door do I need?
The size the equipment needs. Identify the largest item that must be serviced or removed through the ceiling, add working room for hands and tools, and make that your A-size. If that size falls inside the Planea standard range, a standard panel will do. If it exceeds it, you need a custom Zenith+ size.
What is A-size vs B-size?
A-size is the visible opening dimension, edge to edge in the finished ceiling. B-size is the outer frame size, outer to outer. B equals A plus the flange on both sides: 29 mm per side for Planea, 26.8 mm per side for Zenith+. Always state which one you are quoting.
Why does a 600 × 600 trap door not fit a 600 × 600 opening?
Usually because the two 600 figures are different dimensions. A 600 × 600 A-size Planea panel has a 658 × 658 mm frame. If the ceiling was set out for a 600 mm frame, the panel cannot fit. Check whether your 600 refers to A or B before ordering.
When is 600 × 600 too small?
When the unit behind the ceiling cannot be serviced or removed through it. If a fan coil unit, ductable AC unit, or air handling unit needs to come out, and it cannot pass through 600 × 600 mm with working room, the opening is too small regardless of how standard the size feels.
How many shutters does a large opening need?
As many as the opening width and access frequency require. Zenith+ offers two, three, four or more shutters, each sliding to one or both sides. The count is chosen so no single shutter is too large to handle safely and the full opening clears without a crossbar.
Can I order a custom size, or must I pick from a list?
Both. Planea covers standard sizes with custom sizes on request inside its range, and Zenith+ is made to any custom size from 900 × 1500 mm to 5500 × 2400 mm and beyond. State your A-size and what must pass through it, and the panel is made to that dimension.
Conclusion
Choosing a ceiling trap door size is a three-step decision, and the order matters. First, decide what must pass through the opening. Second, turn that into an A-size with working room. Third, state that A-size clearly, with the ceiling type and series, and let the supplier derive the B-size from the correct flange figure. Skip the first step and you get a standard panel that cannot do the job. Skip the third step and you get a custom panel that cannot fit the ceiling.
If you are about to order, measure the opening, note the largest item behind it, and share both together. For a standard size, the Planea range will cover most routine access points. For anything larger, or anything where the equipment dictates the dimension, a Zenith+ custom size with the right shutter count is the honest answer — and it is far cheaper than cutting a finished ceiling open later to fix a panel that was ordered too small.
Share your A-size opening, ceiling type, and what must pass through it — Get a Quote